Resin Gem Guide
 |
Author: Alice and Mario are a cosplaying couple who use each other's strengths to create amazing costumes. Mario takes care of armor, molding, weapons and shields, and Alice takes care of wigs, accessories and sewing. Together they post tutorials on their blog, Arms, Armor and Awesome, that range anywhere from simple gem tutorials to harder weapon tutorials. |
Note: this tutorial is for two part molds and 3D gems. If you're making a gem with a flat back, you would do it differently. This video by TAP Plastics explains how. You can also sculpt your own gems instead of using ones that already exist like in their video, and you could also use the silicone we're using instead of the platinum silicone. Also, Kamui recently made a tutorial on her blog on how to do the flat gems, so check that out, too!
First, you'll need:
- Sculpey $3.00 per block
- Clay (we used an oil based clay, water based will dry out and potentially ruin your mold) $8.00 for 2 lbs
- Cardboard or wood (something to build the walls of the mold with)
- Hot glue gun
- Mold release
- Clear casting resin $18.00 per 16 oz
- Transparent resin dye (there are other dyes to use, but that's what we used) $6.00 a bottle
- Mixing cups with measurements on the side
- Krylon crystal clear spray (or another clear setting spray)
- Mold silicone (we used Tap's RTV silicone) $23.00 per 1lb kit. Gets slightly cheaper the more you buy at a time.
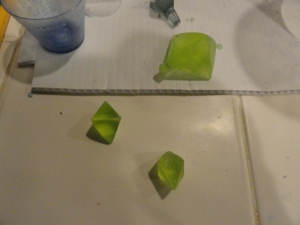
The first step is to sculpt the gems you need. I don't have pictures of all of the gems we sculpted, but these are the three smaller ones. The two small gray ones were sculpted using a two part epoxy clay, and the white one was made with sculpey (which needs to be baked to harden, don't forget!). Make sure you sand them all down very smoothly with a fine grit sandpaper, the silicone will pick up every single detail on these and they will show up on your gems.
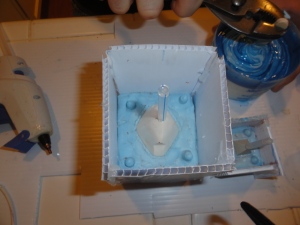
Then, we make our mold box. You want to make sure that there is at least half an inch in between the edges and the bottom of your gems, and the walls of the box. You can make a mold box by first making a square of clay that is thick enough for the gem to go through halfway. After that, you need to hot glue the sides together to form the box. Make sure they're watertight or the molding compound will leak out, and that the clay around the edge of the gem is as smooth and flush to the surface as you can make it.
Use the end of a pencil (eraser part) or end of a pen to make some "keys" around your gem in the clay. Just press down into the clay and create a small pocket so that the mold will got back together right. After your mold box is secure, spray the mold a few times with your mold release, and let it dry. A good way to measure how much silicone you'll need to pour for each half of the mold box is to fill it up with rice, then measure how much rice it took in ounces. We needed 24 oz of material for all of our molds. Remember, you will have to cast two sides of each mold.

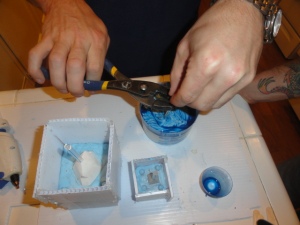
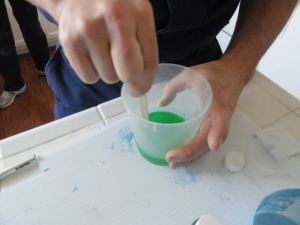
I didn't get a good picture of Mario stirring the silicone before, so here's one after the first half of the molds were done. Make sure you follow the directions on the container for mixing the silicone! This stuff is THICK, so he used a tool to hold on to the popsicle sticks, and stirred it until it was completely mixed (about three minutes).
Because the molding compound is so thick it traps and holds air bubbles very easily and any trapped bubbles could ruin your cast if they are trapped next to your gem. If you have access to a vacuum pot, work quick and remove the air from the compound.
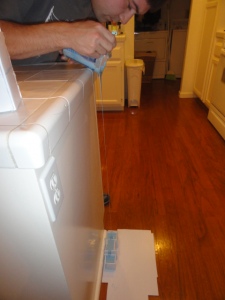
The poor mans way to remove trapped air bubbles from the compound may seem silly at first but the idea is pretty simple. If you make the silicon stretch out, there won't be enough material to hold the bubbles in and they will pop.
It's recommended to pour the silicone from a counter or table, with the molds on the floor. Also make sure that you pour into the corner of the mold, not on top of the gem or whatever you're molding, to prevent air bubbles in your mold.
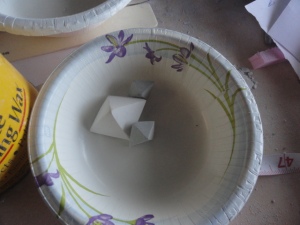
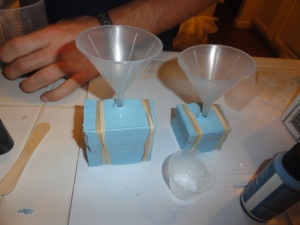
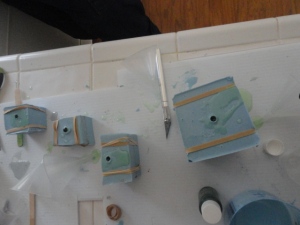
Now, the mold needs to set overnight, or at least 4-6 hours before you can de-mold. You'll need to take off the walls of the mold, clean off the clay (it should come off easily with the mold release) and reattach the walls with the part that you just molded in silicone at the bottom, as shown above.
You'll need to attach something to make a hole to pour your resin in later on (we used a straw attached with a dab of hot glue and closed the hole at the top of the straw closed up with hot glue.) Try and position the straw on a non showing face, or somewhere you think you can clean up the extra material from. Once you pour your resin you will end up with a large stray shaped piece of resin sticking off your gems.
Spray again with mold release, and mix up your next batch of silicone!
Measure out the amount of resin you need followed by adding color. Mix it in a drop at a time until it's to the shade you need. You can always add more, but you cant get it back out.
Follow the directions for the catalyst to resin ratio. Unlike fiberglass the amount of catalyst is based on the thickness of the cast. If you put in too much the resin will react and get too hot. This will cause flaws and possible cracking in the final piece.
We used a few drops extra of catalyst (7-10 drops if the mold isn't thicker than 1-2 inches), because our first batch was a bit slow to set up.
Hold the funnel at the very top of the pour hole, and slowly pour in your resin until the mold is completely full. Let it sit and make sure to pop any air bubbles that come to the surface of the pour hole, if that happens then pour in more resin.
Let the resin set, at least 4-6 hours (depending on the amount of catalyst used) before demolding the gems. (It may take a practice run to get a good mix.) Then you want to rough wet sand the gems with 220 grit sandpaper, and then refine the shape by wet sanding them with 600-1000 grit sandpaper for a nice, smooth finish. (I do all my fine detail sanding on a piece of glass to ensure I have a perfectly smooth and flat surface) The gems will appear to have a haze or fog to them, this is normal.
Finally, spray them with the Krylon crystal clear (or a clear gloss spray), and you're done!